(2022.12.05 최종 수정)
개인 프로젝트를 진행하던 중 페이지 별로 반복 호출되는 API들이 있었다.
대표적으로 게시판 별 추천글 목록, 전체 인기글 목록 등이 있었다.
이러한 반복적으로 호출되는 쿼리를 줄여 부하 분산을 하기 위해 프로젝트에 Spring Cache를 도입하였다.
왜 Redis를 선택했을까?
캐시는 크게 로컬 캐시와 글로벌 캐시 두 가지가 있다.
로컬 캐시는 각각의 WAS 내부 저장소에 캐시를 저장하는 방식이다. WAS의 리소스를 사용하기 때문에 속도는 빠르지만 Scale-Out 방식의 서버 확장시 서버간 데이터 공유가 안되어 일관성 문제가 발생할 수 있다는 문제가 있다.
글로벌 캐시는 별도의 캐시 서버를 두고 WAS에서 캐시서버를 참조하는 방식이다. 캐시 데이터를 얻을 때 마다 트래픽이 발생하기 때문에 로컬 캐시보다 상대적으로 속도는 느리지만, 서버간 데이터를 공유하기 용이하다.
현재 진행하는 개인 프로젝트는 글로벌 캐시를 활용하기로 했다. 그 이유는 향후 프로젝트를 Scale-Out 해볼 생각이 있었고, JWT RefreshToken을 도입할 생각이 있기 때문에, 장기적으로 글로벌 캐시를 사용하는 것이 더 좋은 방법이라고 생각했다.
Spring Cache
이해를 돕기 위해 예제 프로젝트를 작성하였다. JPA, H2 DB를 활용하였다.
https://github.com/cjsrhd94/redis-practice
application.yml
spring:
  datasource:
    driver-class-name: org.h2.Driver
    url: jdbc:h2:tcp://localhost/~/redis;
    username: sa
    password:

  redis:
    port: 6379
    host: localhost

  jpa:
    hibernate:
      ddl-auto: create
    properties:
      hibernate:
        format_sql: true
        dialect: org.hibernate.dialect.H2Dialect

logging:
  level:
    org:
      hibernate:
        SQL: debug
        type: trace
redis는 기본적으로 6379포트를 사용한다. host는 엔드 포인트로 로컬 환경에서는 localhost로 작성하면 된다.
RedisConfig
@EnableCaching // Spring 에서 Caching을 사용하겠다고 선언한다.
@Configuration // 해당 class는 configuration이다.
public class RedisConfig extends CachingConfigurerSupport {

    // yaml 파일에서 host 값을 가져온다.
    @Value("${spring.redis.host}")
    private String redisHost;

    // yaml 파일에서 port 값을 가져온다.
    @Value("${spring.redis.port}")
    private int redisPort;

    @Bean
    public RedisConnectionFactory redisConnectionFactory() {
        return new LettuceConnectionFactory(new RedisStandaloneConfiguration(redisHost, redisPort));
    }

    @Bean
    public RedisCacheManager redisCacheManager(RedisConnectionFactory redisConnectionFactory) {

        // 캐시의 Key/Value를 직렬화-역직렬화 하는 Pair를 설정한다.
        RedisCacheConfiguration configuration = RedisCacheConfiguration.defaultCacheConfig()
                .serializeKeysWith(RedisSerializationContext
                        .SerializationPair
                        .fromSerializer(new StringRedisSerializer()))
                .serializeValuesWith(RedisSerializationContext
                        .SerializationPair
                        .fromSerializer(new StringRedisSerializer()));

        // 캐시이름 별로 만료기간을 다르게 사용하기 위한 설정이다.
        Map<String, RedisCacheConfiguration> cacheConfigurations = new HashMap<>();
        cacheConfigurations.put(CacheKey.USER, RedisCacheConfiguration.defaultCacheConfig()
                .entryTtl(Duration.ofSeconds(CacheKey.USER_EXPIRE_SEC)));
        cacheConfigurations.put(CacheKey.POST, RedisCacheConfiguration.defaultCacheConfig()
                .entryTtl(Duration.ofSeconds(CacheKey.POST_EXPIRE_SEC)));

        return RedisCacheManager
                .RedisCacheManagerBuilder
                .fromConnectionFactory(redisConnectionFactory)
                .cacheDefaults(configuration)
                .withInitialCacheConfigurations(cacheConfigurations)
                .build();
    }
}
RedisConfig에서는 yaml파일에서 작성한 정보를 토대로 WAS와 캐시 서버의 connection을 생성한다. 서버간 통신에 필요한 직렬화하는 클래스를 선택할 수 있으며, 캐시 이름 별로 만료기간을 다르게 설정할 수도 있다.
CacheKey
public class CacheKey {

    private CacheKey() {

    }

    public static final String USER = "user";
    public static final int USER_EXPIRE_SEC = 1800;

    public static final String POST = "post";
    public static final int POST_EXPIRE_SEC = 1800;
}
캐시 키는 캐시 간 구분을 위해 사용된다. 캐시 키는 위와 같이 만료시간과 함께 별도의 클래스로 관리한다.
UserService
@Service
@RequiredArgsConstructor
public class UserService {

    private final UserRepository userRepository;

    @Transactional
    public Long join(UserJoinReqDto joinReqDto) {
        User user = userRepository.save(joinReqDto.toEntity());
        return user.getId();
    }

    @CachePut(value = CacheKey.USER, key = "#id")
    @Transactional
    public UserResDto update(Long id, UserUpdateReqDto updateReqDto) {
        User user = userRepository.findById(id)
                .orElseThrow(() -> new IllegalArgumentException("해당 사용자가 없습니다."));
        user.update(updateReqDto.getNickname(), updateReqDto.getPassword());
        return new UserResDto(user);
    }

    @CacheEvict(value = CacheKey.USER, key = "#id")
    @Transactional
    public Long delete(Long id) {
        userRepository.deleteById(id);
        return id;
    }

    @Cacheable(value = CacheKey.USER, key = "#id", unless = "#result == null")
    @Transactional(readOnly = true)
    public UserResDto getUser(Long id) {
        User user = userRepository.findById(id)
                .orElseThrow(() -> new IllegalArgumentException("해당 사용자가 없습니다."));
        return new UserResDto(user);
    }

    @Cacheable(value = CacheKey.USER, unless = "#result == null")
    @Transactional(readOnly = true)
    public List<UserResDto> getUserList() {
        List<User> users = userRepository.findAll();
        return users.stream()
                .map(UserResDto::new)
                .collect(Collectors.toList());
    }
}
UserService는 다음과 같이 작성하였다. 위에 등장하는 @Cacheable, @CachePut, @CacheEvict가 오늘 설명할 Spring Cache와 관련된 어노테이션이다.
@Cacheable
@Cacheable은 조회 메서드의 return 값을 캐시에 저장한다.
한번 캐시에 저장되면 해당 메서드를 실행하기 전 캐시 저장소를 먼저 조회한다. 캐시 데이터가 있다면 메서드를 실행하지 않고 캐시 데이터를 반환한다.
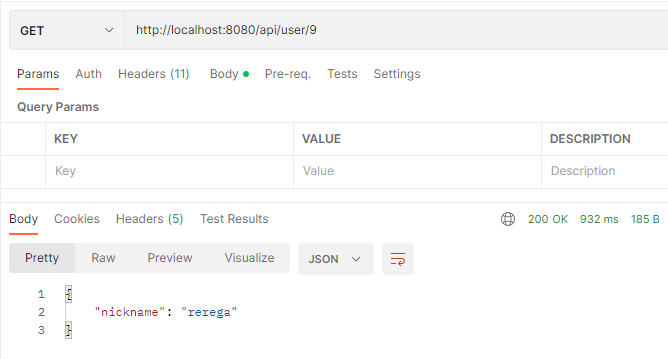

@Cacheable 적용 후 조회 속도가 향상된 것을 확인 할 수 있다. 이후 캐시 만료기한 내에 지속적인 요청을 보내도 쿼리가 발생하지 않는 것으로 데이터가 캐시 서버에서 조회되고 있는 것을 알 수 있다.

redis 서버를 확인해 보면 데이터가 잘 등록된 것을 확인할 수 있다.
@CachePut
@CachePut은 value와 key에 해당하는 캐시를 수정한다.
메서드 실행후 캐시 서버를 조회하여 해당하는 캐시 데이터가 있다면 수정한다.
@CacheEvict
@CacheEvict는 value와 key에 해당하는 캐시를 제거한다.
메서드와 실행후 캐시 서버를 조회하여 해당하는 캐시 데이터가 있다면 삭제한다.
value는 어떤 캐시 정책을 쓸 것인가에 대한 값이고, key는 정책내에서 캐시를 구분해주는 키 값으로 SpEL문법으로 작성한다. unless = "#result ==null" 옵션은 return값이 null 일 때 캐싱 되지 않게 해준다.
@CachePut과 @CacheEvict는 사용시 주의가 필요하다. 모든 캐시 데이터가 DB 데이터와 동일하게 update 되거나 delete되지는 않기 때문에 데이터 불일치가 일어 날 수 있다. 그렇기 때문에 데이터의 update와 delete가 자주 발생하거나 데이터 일치가 중요한 비즈니스 로직은 캐시 대상에서 제외한다. 개인적으로는 캐시 유효기간을 짧게하고 @CachePut과 @CacheEvict의 사용을 지양하는 것이 좋은 방법이라 생각한다.
참조
https://spring.io/guides/gs/spring-data-reactive-redis/
https://docs.microsoft.com/en-us/windows/win32/fileio/local-caching
'BE > Spring' 카테고리의 다른 글
| 본인 확인은 어떤 layer에서 이루어져야 할까? (0) | 2022.07.22 |
|---|---|
| yaml 파일을 그룹으로 관리하기 (0) | 2022.07.09 |
| 스프링 스케줄러(@Scheduled) 사용하는 법 (0) | 2022.06.23 |
| 스프링 부트 실행 환경 분리 (0) | 2022.02.02 |
| @PathVariable, @RequestParam는 각각 언제 사용해야 할까? (0) | 2022.01.20 |


댓글